Showing posts with label blog every day. Show all posts

Sunday, January 05, 2014

12 days of Christmas | Day 12

On the twelfth day of Christmas, Stacey gave to me, twelve old photos, eleven memories, ten amazing movies, nine YouTube videos, eight resolutions, seven must-read books, six make-up tips, five favourite blogs, four amazing people, three recipes, two cute doggies and a new blog post every day.
It's the final installment of the 12 days of Christmas blog posts! I'm a little sad, but also relieved. This was much harder than previously anticipated but I've actually really enjoyed this, it's been a lot of fun and I hope you've all been enjoying reading these.

My final blog post is some old photo's. I've tried to keep my embarrassment to a minimum but I've also thrown in a couple of awkward middle school phase photo's. Enjoy laughing at my younger self! 


Me and my little brother Josh... nawwwrrr.


This is quite possibly my favourite photo of the lot. Haha sorry Josh, but you love me really.


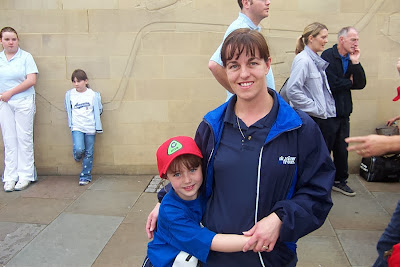
Despite my CBBC hat, I love this photo a lot.


Back in year 4 when I was playing the grumpy sheep in our school Christmas play, The Grumpy Sheep. Not one of my finest moments.


Our old dog Bramble. I wasn't choking her, I swear!


Hahaha! You know what? I'm not even sorry, this photo is just hilarious! The Lion the witch and the wardrobe. 2008 I think?


Thanks for sticking with me for the 12 days of Christmas, I'll see you all soon!

Cheerio x

Monday, December 30, 2013

12 days of Christmas | Day 6

On the sixth day of Christmas, Stacey gave to me, six make-up tips, 5 favourite blogs, four amazing people, three recipes, two cute doggies and a new blog post every day.
I'm not a beautician, nor am I a professional make-up artist, but I thought that today I would share with you 6 make-up tips that I swear by, enjoy!

1. Use make-up brushes
This may seem like I am stating the obvious, but a lot of people don't actually use make-up brushes, yet using them really changes the way you apply your make-up and makes the finished product look so much better. For example, using a foundation brush means that your foundation won't appear streaky and you will have even coverage and a flawless finish.


Here are 8 basic brushes which make-up artists believe help with your application:

1. Foundation brush (these can either be flat or round, depending on which you prefer)
2. Concealer brush
3. Fluffy powder brush
4. Blush/angled contour brush
5. Small blending brush
6. Flat eyeshadow brush
7. Precision angle brush
8. Lip brush

2. Concealer
Your skin is made up of a lot of different colours, and sometimes you want to eliminate these for example, the redness around your nose or chin, the redness of spots or the dark blue circles under your eyes. Using the same concealer for different colours will not help eliminate the beasties.

Image credit


Opposite colours actually cancel eachother out. So, if you look at the colour wheel, a green pigmented concealer would eliminate redness, which is perfect for spots, and an orangey-pigmented concealer would eliminate the blueness of under-eye bags.

3. Filling in eyebrows
Sometimes we go a little crazy with the tweezers, making our brows look a little sparse, or they are just simply not the shape we want them to be, so we turn to filling in (or drawing in, in some cases) our eyebrows.

My first tip would be to use a powder rather than a pencil, because you don't want your eyebrows to look drawn on, you want them to look as natural as possible. I would suggest getting a matte eyeshadow matching your natural hair colour, unless your eyebrows are naturally very dark, then go for a slightly lighter shade. For example, if you have black eyebrows, go for a dark brown colour to fill them in. If you do use a pencil, use light upward strokes and don't draw your eyebrows in as if you are following a dot-to-dot.

Image credit


This photo here shows you how to shape your eyebrows.
Line A: To find where you should start your brows, follow a straight line up from the side of your nose.
Line B: To find where the highest point of your brow should be, follow a straight line up from the outer part of your iris.
Line C: To find where your eyebrow should end, follow a line from the side of your nose up diagonally to the outer corner of your eye. Where line D crosses is where your eyebrow should end.

Remember, eyebrows are sisters and not twins; it's okay if they aren't exactly the same.

4. Contouring
Sometimes we don't like the shape of our face, other times we want to accentuate our features. Contouring is the art of highlighting and shading different parts of the face, to 'alter' the shape. The image below shows you where to highlight, and where to shade your face. When contouring, apply in circular motions so you don't get a harsh dark line. This obviously isn't the finished product, I've been much stronger with the contouring than normal so you can see what I mean.


5. Colours for eyes
Some eyeshadows do not suit certain eye colours, however if you put colours that cancel eachother out next to one another, they can help eachother stand out.

Image credit
For blue eyes, because orange is the opposite colour, use eyeshadow with orangey undertones such as gold which will really make the blue in your eyes 'pop'.

For green eyes, red is the opposite colour, use eyeshadow with redish undertones such as plum to make your eyes stand out.

Brown is a neutral colour meaning any colour will work with it, however the most 'stand out' colour would be your purples.

6. Smokey eyeshadow
I'm not going to lie, it has taken me a good few years to perfect the smokey-eye look, and some days it still looks pretty bad, but hopefully these tips will help you create your perfect smokey eye.


Start off by choosing 4 different shades. For this look I went for a black smokey eye so you could see the effect better. 
1. Begin by using a flat eyeshadow brush and packing the second-lightest colour  all over your lid as your base colour. 
2. Using a blending brush, put the lightest colour in the inner corner of your eyes to brighten them and open them up.
3. Using a blending brush again, blend the second-darkest colour over the outer corner to the middle of your eye and also through the crease.
4. With a clean blending brush, soften the edges of the eyeshadow outwards and upwards.
5. Again with the blending brush, blend the darkest colour into the outer corner of your crease and up.
6. So the black doesn't look too sharp, use a clean blending blush and blend the colours together.


I hope you enjoyed reading today's blog post and have come away with some helpful tips. I'd really appreciate your comments because although this post took hours, it has been my favourite to do and I am tempted to do more of these in the future.

See you all tomorrow!

Cheerio x


Sunday, December 29, 2013

12 days of Christmas | Day 5

On the fifth day of Christmas, Stacey gave to me, five favourite blogs, four best friends, three recipes, two cute doggies and a new blog post every day.
Before making my own blog I read quite a few which got me 'into' the whole blogging thing, and today's 12 days of Christmas blog post is dedicated to my favourite blogs which I think you should all check out!

The first is the first blog I came across was sprinkleofglitter. Louise's blog is mainly beauty,baby and lifestyle. It's such a happy blog, the photo's she puts up are so colourful and beautiful, and you can't help but smile when you read it, especially the posts about her daughter- what a cutie! She also has a YouTube channel under the same name which has over 1 million subscribers.


To check out sprinkleofglitter, click here

Another of my favourite blogs is Tanya's Burr's beauty, style and lifestyle blog. Tanya is a makeup artist and I first came across her on YouTube with her makeup tutorials. Girls watching this, I highly recommend them! Her blog is brilliant as she writes posts about her favourite products, which helps, for example, if you don't know which foundation to go for. She also posts about her life, again, with lovely photos.


To check out Tanya's blog, click here.

Again, there is a running theme with this blog post, as I found out about Zoe Sugg's blog through her YouTube channel which has over 3 million subscribers. Zoe's blog, Zoella is also a beauty and lifestyle blog. I love her writing style and her posts are also helpful, especially her DIY ombre post.


To check out Zoe's blog, click here.

Carrie Fletcher is another person I found about through YouTube,  she started her blog 'alliknownow' back in April and I've been loving it. She posts about her thoughts and feelings. They are so well written and leave you thinking for a long time- very inspiring and I urge you to check it out.


To check out Carrie's blog, click here.

Last but not least is 'a-small-islander'. She is one of my nearest and dearest friends and began her blog in the beginning of December. So far, her posts have been lifestyle, posting about her birthday and Christmas- they are really cute and think you should go have a look at her blog because it will make both of us very happy.


To check out Kirsty's blog, click here.

*Disclaimer* I do not own any of the photo's used in today's post.

See you tomorrow!

Cheerio x

Friday, December 27, 2013

12 days of Christmas | Day 3

On the third day of Christmas Stacey gave to me, three recipes, two cute doggies and a new blog post every day.
I've been doing a lot of baking recently, so I thought, what would be more fitting than three quick and easy recipes?!
 
Homemade Hot Chocolate
 
I'm currently sat at my computer sipping away at this recipe- it's quick, easy, and tasted delicious!
 
Ingredients:
A mug of milk
A chocolate bar of your choice
Squirty/fresh cream (optional)
 
  1. Pour milk into your mug so you know how much you will need to heat for your hot chocolate.
  2. Pour this into your pan and heat on a low heat so you don't burn the milk and stir often.
  3. Add the chocolate of your choice (I went for Dairy Milk Caramel and it was amazing!) I added three squares of chocolate but you can add more or less depending on how milky or chocolaty you would like your hot chocolate. Continue to stir.
  4. Once the chocolate has melted and the milk is hot, pour your hot chocolate back into your favourite mug, add fresh or squirty cream and decorate as you wish!


Fairy Cakes 

Ingredients:
100g margarine
100g caster sugar
100g self-raising flour
2 medium eggs

  1. Preheat the oven to 180°.
  2. Cream together the margarine and sugar until light and fluffy.
  3. Beat in the eggs one at a time, adding a little flour with each. Then fold in the remaining flour.
  4. Place cupcake holders into the a tray and spoon in the mixture.
  5. Leave in the oven for 20-25 minutes.
  6. Once baked, leave to cool.

You can then decorate the cakes as you wish, but I decided to make butter icing (mixing butter and icing sugar) and covering them in pink sprinkles.


Shortbread Biscuits


Ingredients:
225g plain flour
110g caster sugar
110g margarine
1 medium egg
teaspoon of water

  1. Preheat the oven to 180°.
  2. Mix together the flour, sugar and chopped margarine using your fingers until it resembles breadcrumbs
  3. Add the egg and teaspoon of water. Mix together until it starts to form a ball. Use your hands towards the end.
  4. Flour your surface and rolling pin. Roll out the dough to the thickness of approximately a pound coin.
  5. Either cut the shapes yourself or use cookie cutters.
  6. Place the biscuits on a baking tray and leave to bake for 10-15 minutes.
  7. Take out the biscuits and leave to cool.
  8. Decorate as you wish. I sprayed the stars with edible glitter and used coloured icing to decorate the teddy bears with a face and bow tie!


I hope you enjoyed this blog post as I realise it is something very different to what I normally do!
 
See you tomorrow!
 
Cheerio x

Thursday, December 26, 2013

12 days of Christmas | Day 2

On the second day of Christmas, Stacey gave to me, two cute doggies and a new blog post every day.
These two are my absolute world. Obviously I'm going to be biased here, because they're mine, but they are quite possibly the loveliest dogs ever.

They drive me round the bend sometimes but they are always willing to have a cuddle, want to attack me with slobbery kisses and cheer me up when I am down. They even get excited when they hear us sing Happy Birthday!


When I leave in the summer I don't know what I'm going to do without them!

 
See you all tomorrow!
Cheerio x